

Table of Contents
Using the TetherBox Offline Interface
The TetherBox offline interface gives you local access to cameras and recordings when you are on the same network as the TetherBox. You can also open it while the Internet connection is working. The TetherBox must be powered on and reachable from your computer or phone.
The offline interface provides a smaller set of controls than the TetherX platform. Live View lists cameras on the TetherBox you opened, so there are no timeline or site selectors. This guide describes the current interface; older TetherBox software may need an update to show Live View.
Connect to your TetherBox
- Connect your computer or phone to the TetherBox's local network.
- Enter the TetherBox's IP address in your browser. For example,
http://192.168.1.53. - In TetherX, click your profile picture in the top-right corner and open the API Details tab.
- Copy TetherBox API Token and paste it into the offline interface's token field, then select Sign in.
Sign in to TetherX while the TetherBox is connected to the Internet before you need offline access, so the TetherBox can receive your account and permissions. If you cannot find your token, ask your administrator before an outage.
You can find a TetherBox's IP address in Admin, under TetherBoxes, by opening the unit. Your network administrator can also help you find its local address.
- The sign-in page has a token field and a Remember Me option. Use Remember Me on a device you control.
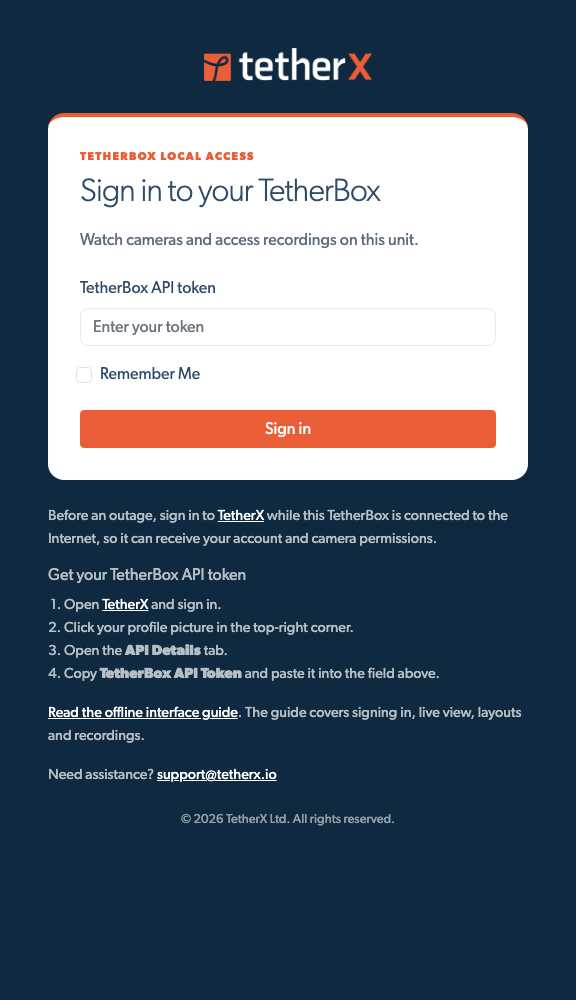
Your account's camera permissions still apply. Cameras and permissions must already be available on the TetherBox; changes made in the cloud need to reach it before it loses connectivity.
Open Live View
Select Live View in the left menu. Choose a layout, then click the camera name in the thin bar at the bottom of a tile to choose a camera. You can choose the same camera in more than one tile. Use × to clear a tile.
- The browser remembers your camera choices, layout and playback mode for your account on this TetherBox.
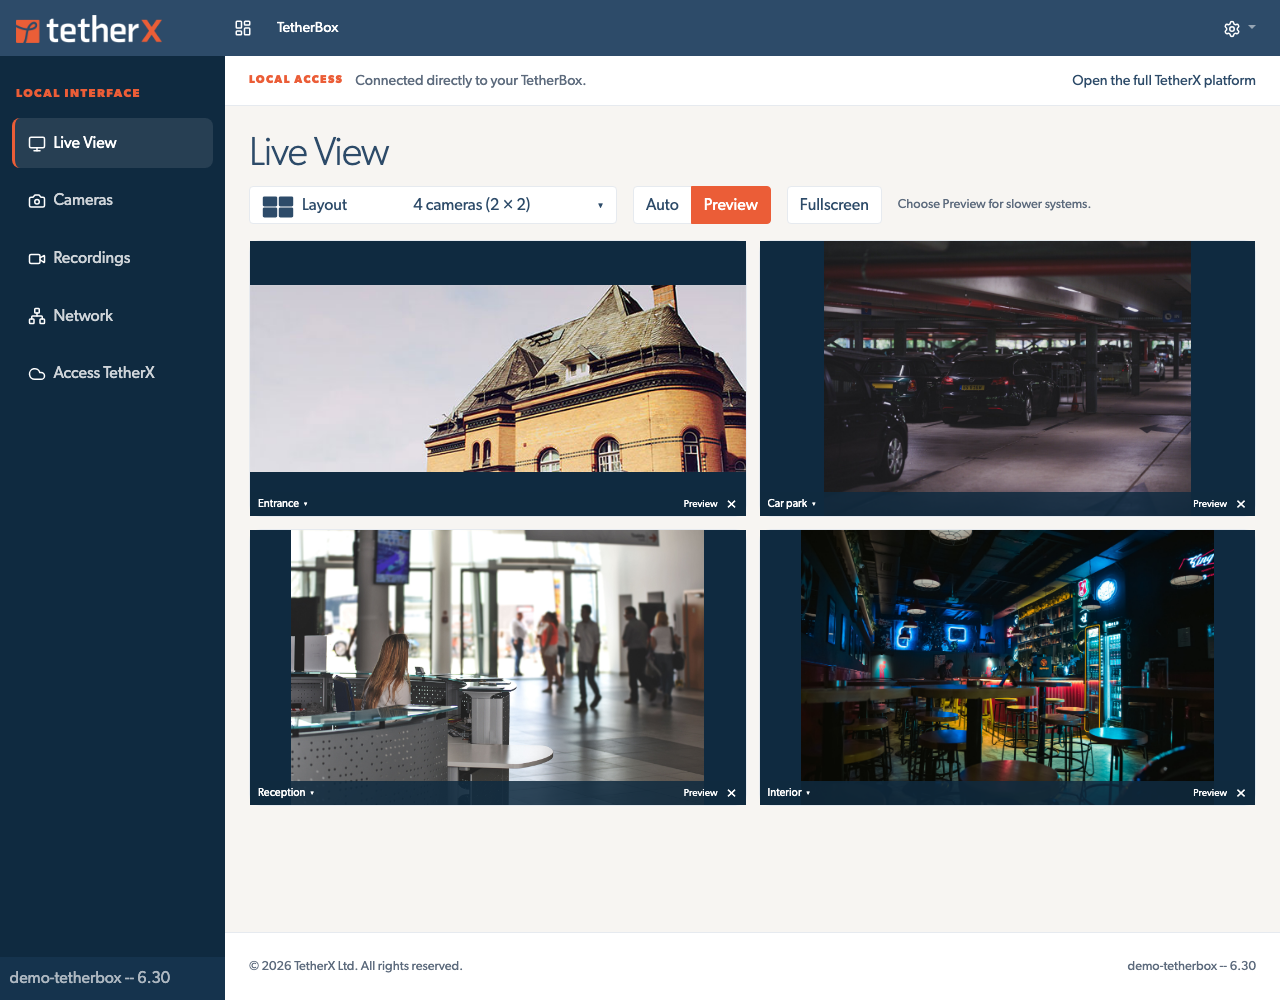
The Cameras page lists camera previews and basic information. Open a camera for its individual live view and local API details. Access TetherX opens the full platform when your Internet connection is available.
Choose a Layout
Select Layout above the grid, choose a screen-shape tab and click a layout picture:
- Normal includes grids from one to 100 cameras, plus layouts with larger featured tiles.
- Ultra-wide includes wider grids and layouts with a large camera beside smaller tiles, suited to wide monitors.
- Portrait includes layouts for screens held upright.
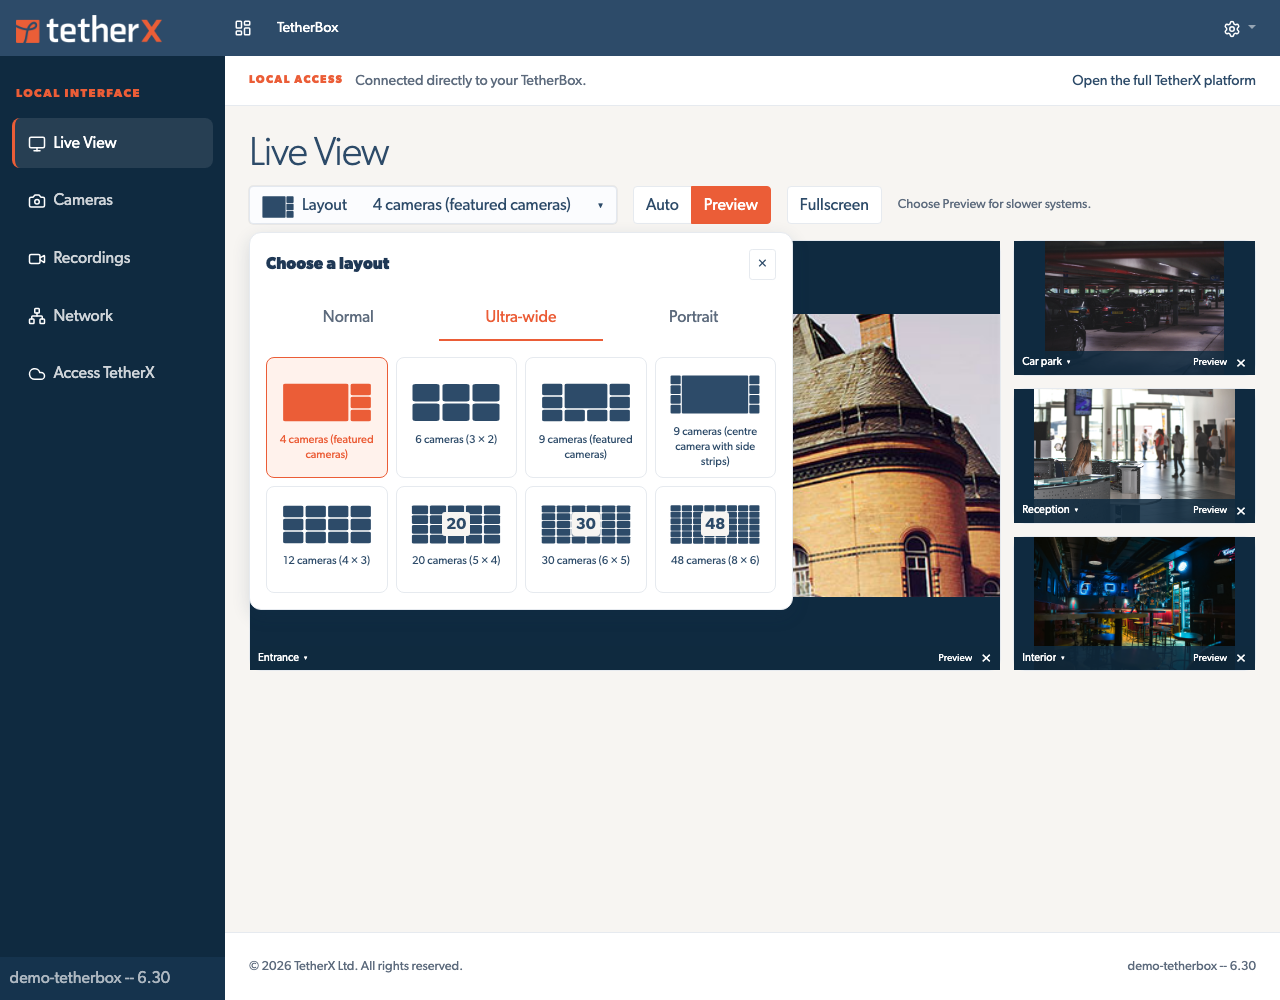
Choose Fullscreen to give the wall the whole display. Double-click a camera image to fullscreen that camera, then double-click again to return to the layout. A small TetherX logo stays visible in fullscreen. Press Escape to leave fullscreen. On small screens, the tiles arrange into fewer columns for readability.
- An ultra-wide layout can give one camera most of the wall and keep three cameras down the side.
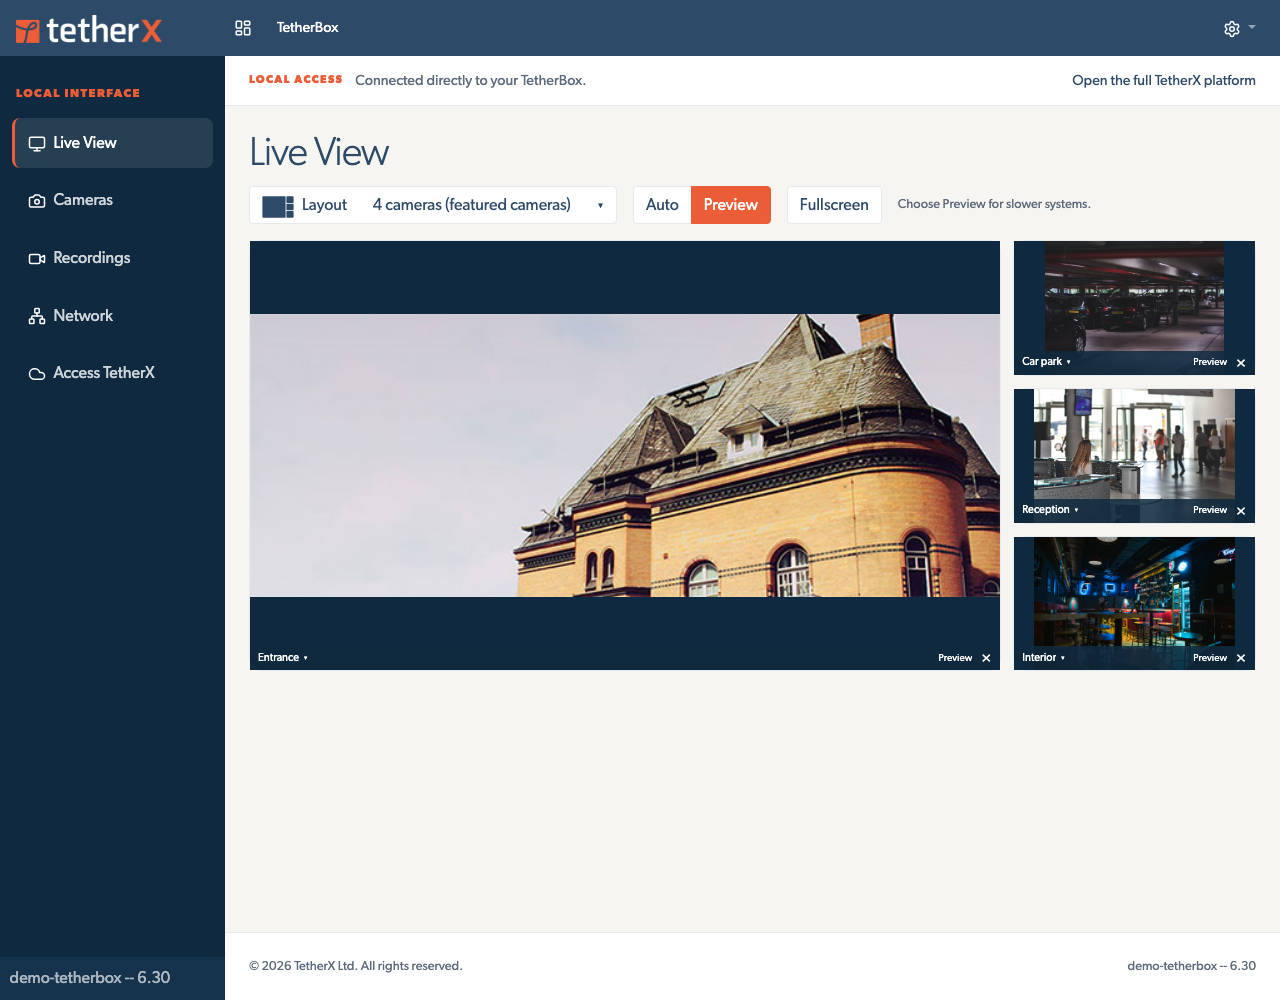
The screenshots use demonstration images to illustrate the controls.
Choose Auto or Preview
| Mode | Behaviour |
|---|---|
| Auto | Tries WebRTC when enabled on the TetherBox and supported by the browser, then low-latency video streaming, then snapshots. |
| Preview | Refreshes still images instead of decoding video. Choose it for slower computers or large camera grids. |
WebRTC needs a trusted HTTPS connection to the TetherBox. Opening an ordinary HTTP IP address still lets Auto use the other playback methods. Ask your administrator for the TetherBox's HTTPS address if you need WebRTC.
The camera's live-view schedule applies to both modes. A camera that is unavailable or outside its live schedule cannot provide a live picture. The wall pauses playback while the browser tab is hidden and resumes when you return.
Browse Recordings
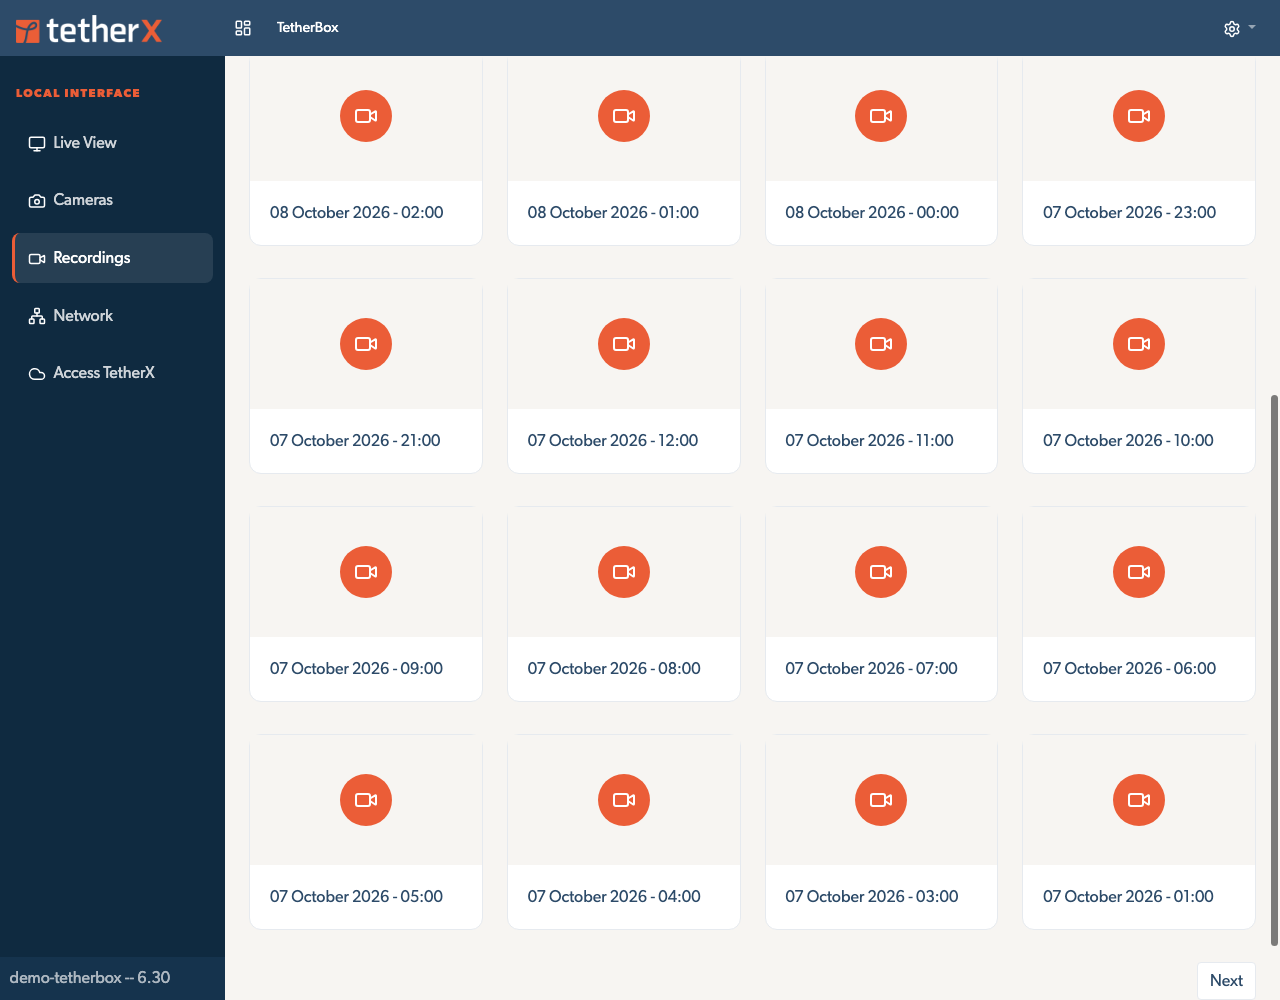
Select Recordings to browse footage stored locally on the TetherBox. Choose a Camera, then a Drive. The newest recorded hours appear first. Select Next for older hours or Previous to return to newer hours. Open an hour to play its clips or download a copy.
Camera and drive selections update the recording list automatically. You can also select Show. Each page contains up to 24 recorded hours. Next appears below the cards when older hours are available; Previous appears after you move to an older page. Changing the camera or drive returns to the newest hours for that selection.
Your account's recording permissions apply separately from live-view permissions. The available footage depends on what the TetherBox has recorded and retained on its storage.
- Open an hour to see its video clips. When a thumbnail is unavailable, a video icon identifies the hour.
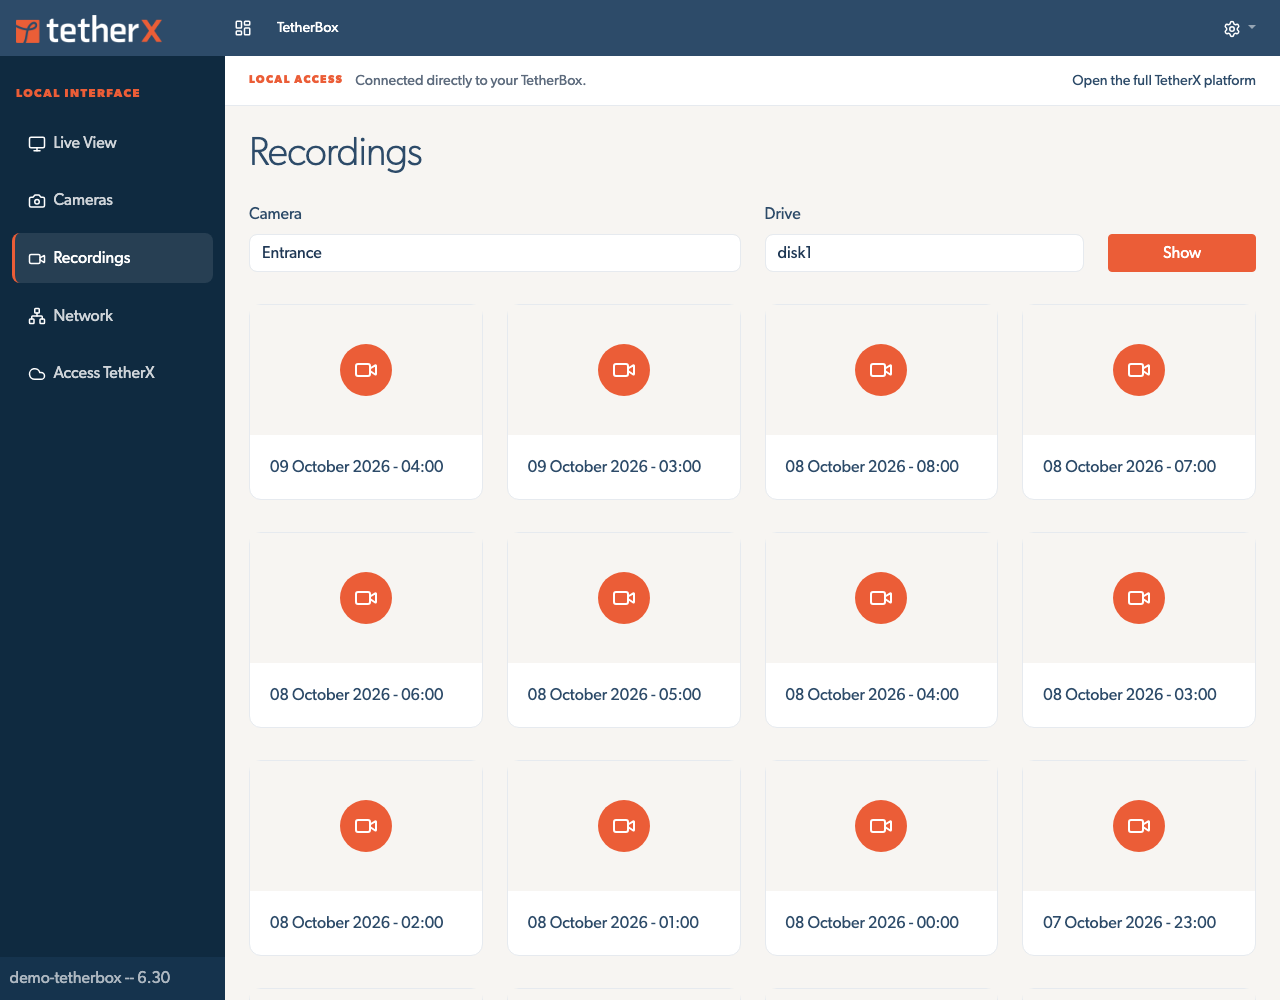
Each clip shows an available thumbnail from its recording period before playback starts, including thumbnails stored with the timelapse images.
- Scroll below the hour cards to move to older recordings.
Check Camera Information
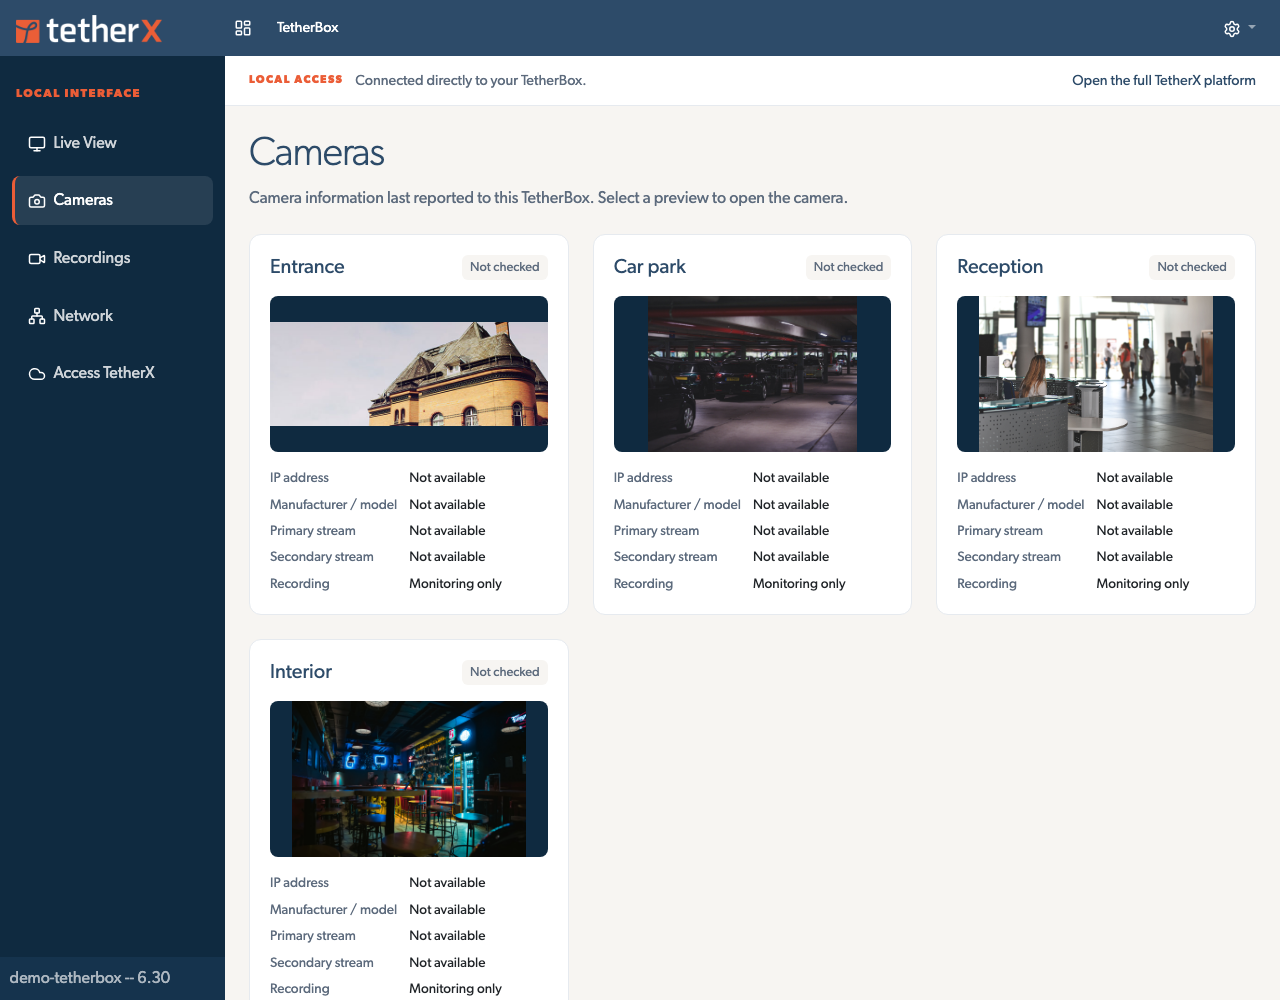
Select Cameras to see each camera's preview, connection status, IP address, manufacturer and model, stream resolutions and recording mode. These details were last reported to the TetherBox. Not checked means the connection status has not been measured, and Not available means a detail has not been detected.
- Select a camera name or preview to open its details.
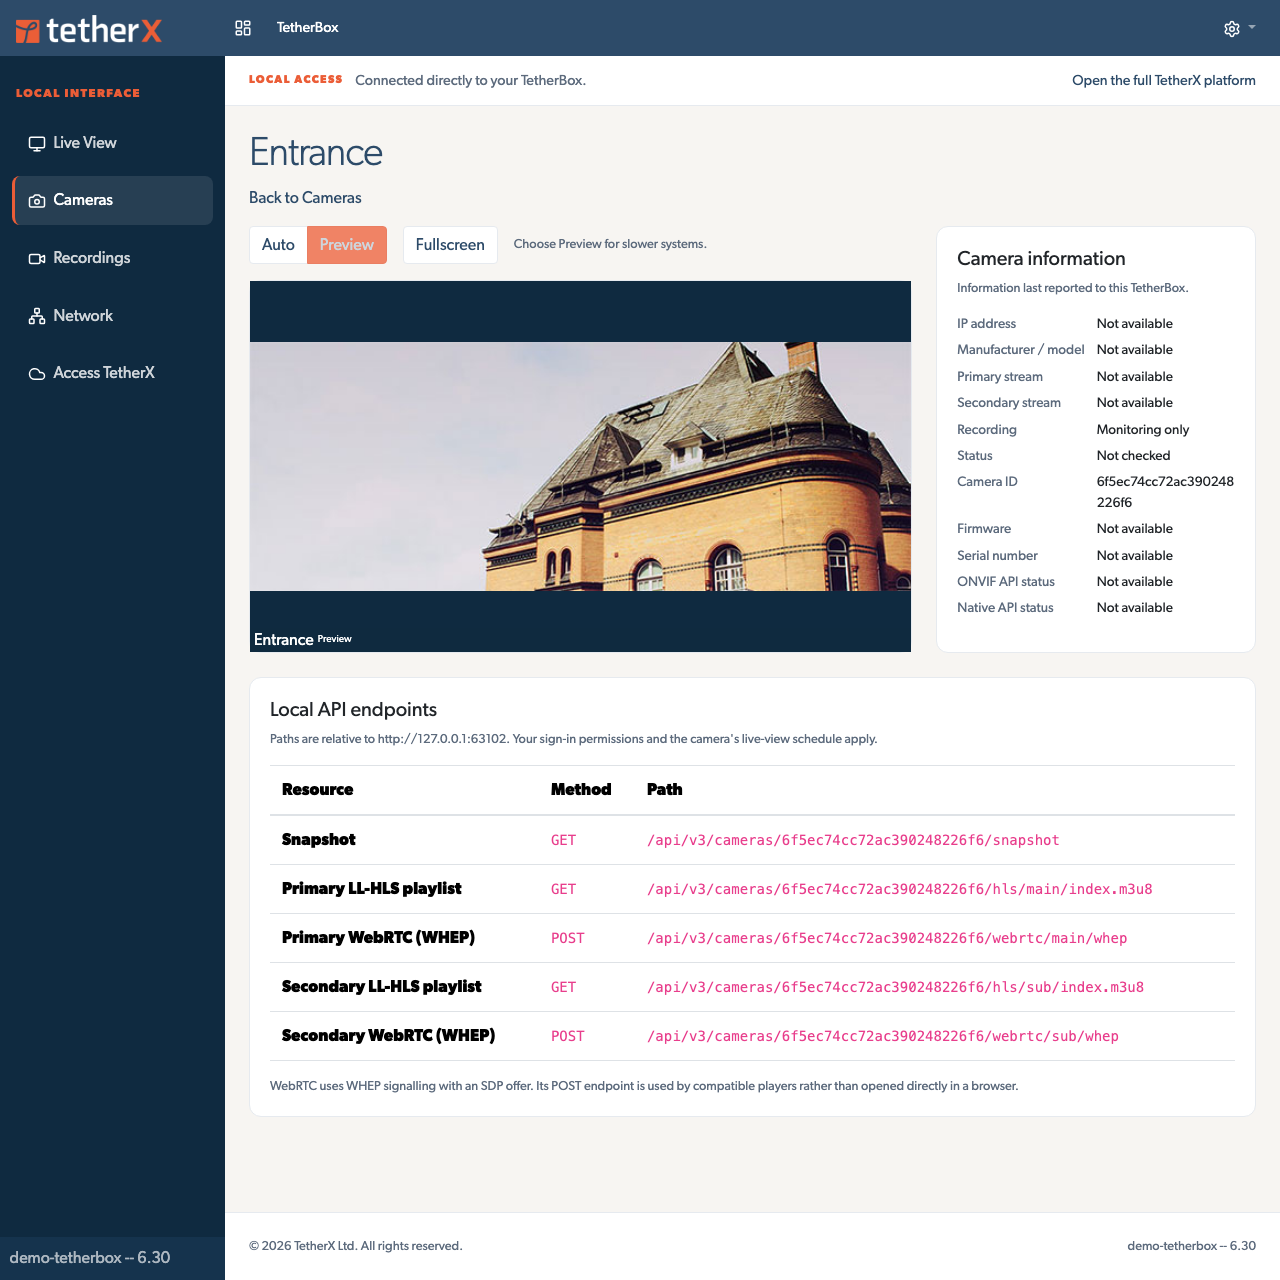
Open a camera to see its firmware, serial number, API status and local snapshot, streaming and WebRTC endpoint paths. Its live picture uses the same Auto, Preview and fullscreen controls as the camera wall.
- The camera page keeps that camera selected. The API table lists the request method and path for each available endpoint; WebRTC paths appear when enabled on the TetherBox. API paths are relative to the TetherBox address shown above the table.
Open Settings and Network Controls
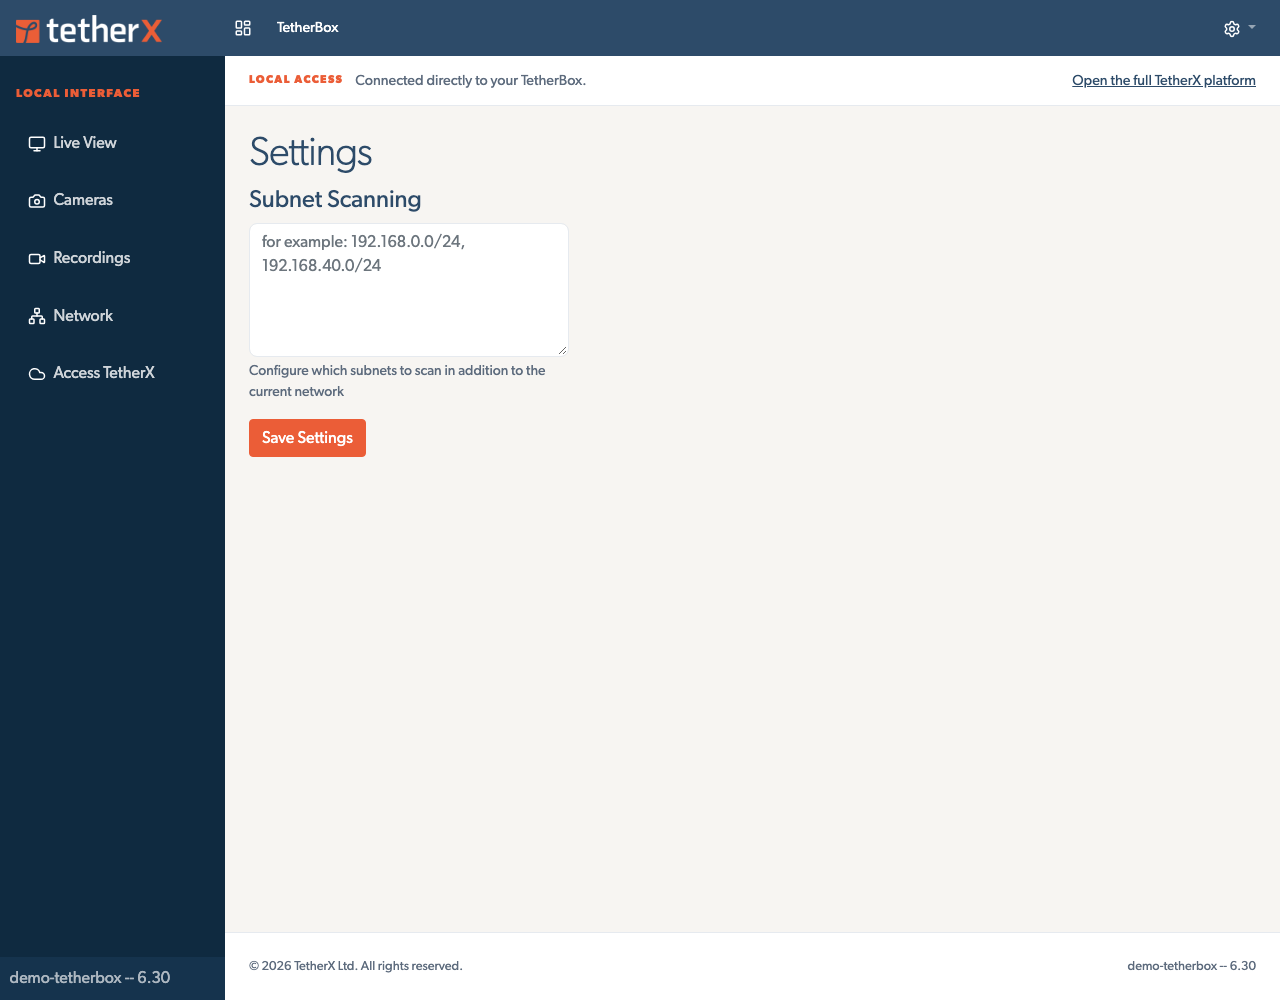
Administrators can open Settings from the cog menu to configure additional subnets for device scanning.
- The Settings page lists the subnets the TetherBox should scan in addition to its current network.
Configure the Network
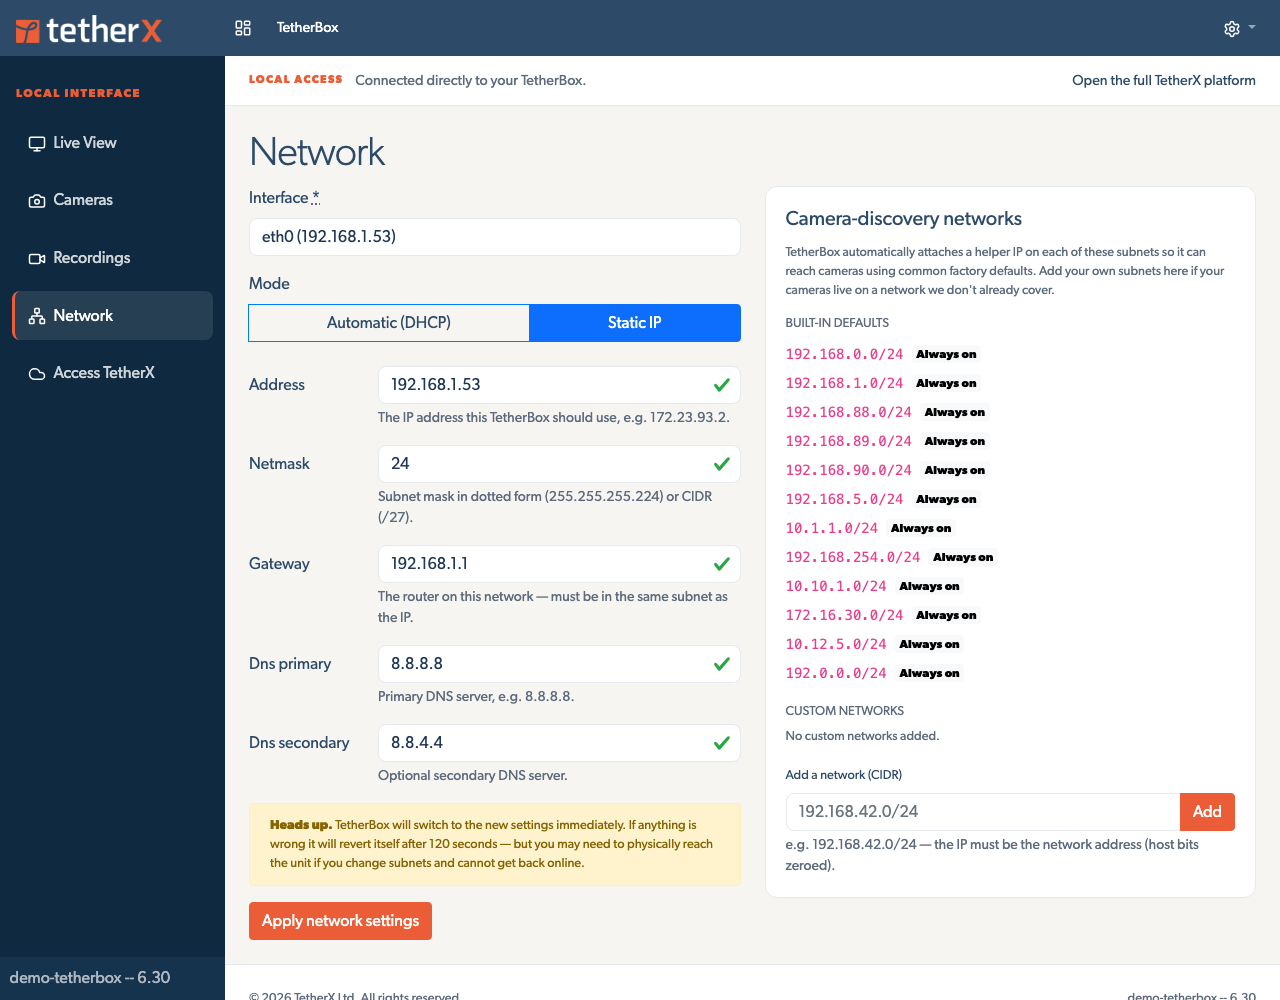
Where possible, use a DHCP reservation on your router to give the TetherBox a consistent IP address. If that is not an option, configure a static address in the offline interface:
- Select Network in the left menu.
- Choose the Interface you want to configure.
- Select Static IP under Mode.
- Enter the Address, Netmask, Gateway, DNS Primary and optional DNS Secondary supplied by your network administrator.
- Select Apply network settings and confirm the change.
- Reconnect to the new address and confirm that the settings should be kept within 120 seconds. The TetherBox restores the previous configuration if you do not confirm in time.
- The Network page also shows the camera networks the TetherBox scans. Choose DHCP under Mode to return to automatic addressing.
Changing the IP address interrupts the current connection. Use a device that can reach the new subnet, or arrange local assistance before applying the change. See Connecting your TetherBox to the Internet for network requirements and DHCP reservations.
Connect to Wi-Fi
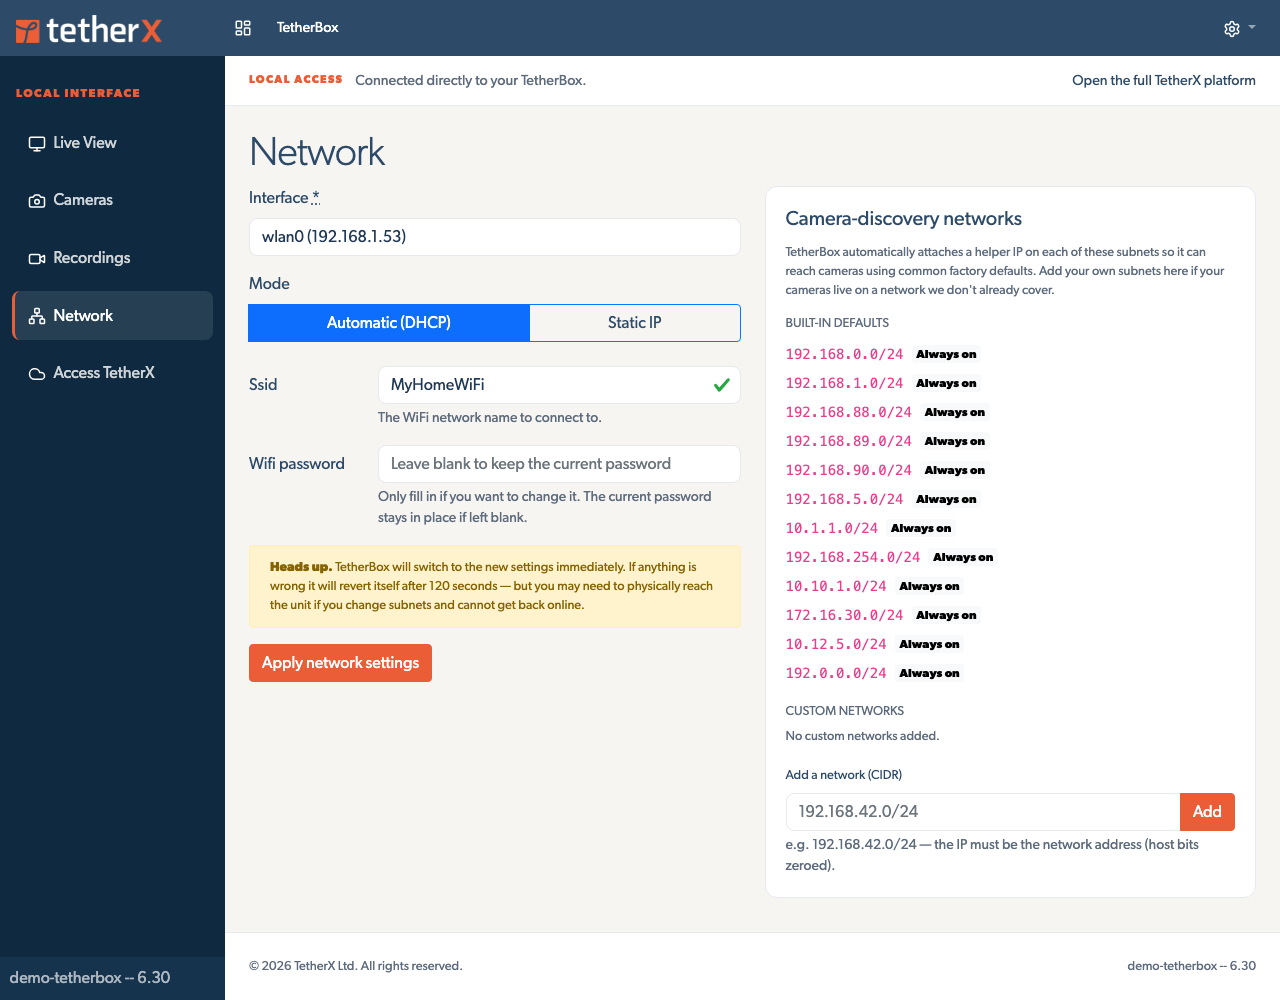
If the TetherBox has a Wi-Fi interface, select it under Interface on the Network page. It is commonly named wlan0. Keep an Ethernet connection available while changing Wi-Fi settings where possible.
- Select wlan0 in Interface.
- Choose Automatic (DHCP) so the router assigns the TetherBox an address.
- Enter the Wi-Fi network name in SSID, for example MyHomeWiFi.
- Enter that network's Wi-Fi password. Leave the password blank only when keeping the currently saved password.
- Select Apply network settings and confirm the change.
- Reconnect using the address assigned by the router and confirm the settings within 120 seconds. Check the router's DHCP leases if the address changes. If you do not confirm in time, the TetherBox restores its previous configuration.
- This example selects wlan0, uses DHCP and connects to MyHomeWiFi. The password field keeps the saved password when left blank.
Use Logout in the cog menu when you finish on a shared device.
Troubleshooting
| Problem | What to check |
|---|---|
| The interface does not open | Check power, the local IP address and that your computer can reach the TetherBox's network. An Internet outage does not prevent local access, but a powered-off or unreachable TetherBox does. |
| The token is rejected | Check that you copied the correct TetherBox API token. Ask your administrator whether your account has reached this TetherBox. |
| A camera is missing | Check your live-view permissions and whether that camera is configured on this TetherBox. |
| Video is slow | Select Preview or reduce the number of visible cameras. |
| A preview is unavailable | Check camera connectivity and its live-view schedule. The wall retries snapshots after a temporary failure. |
| Live View is absent | Ask your administrator to update the TetherBox software. |
Related Articles
Referenced in: