

Table of Contents
Automations and Rules
An automation watches the number of people inside a camera region and takes the actions you choose when that count has stayed above or below a threshold for a set time. For example, email a manager when a counter has been unattended for 60 seconds, or notify a user when a crowd forms near an entrance.
The Rules menu opens the automation list. A camera's Rules tab opens its own automations. The page title is Automations; each saved item is a rule.
Before You Start
- Rules is currently available to Staff users. If you need a rule configured, contact TetherX Support with the camera, area, threshold, duration and required actions.
- Use a camera with TetherX AI enabled on its TetherBox, a working view of the area, and Only Monitor turned off. The builder explains these requirements before opening if the camera is not ready.
- The cloud, TetherBox and AI detector need compatible automation software. A saved rule becomes active after the TetherBox confirms its configuration and reports observations.
- Audio, relay and deterrent actions need the corresponding configured equipment and permissions. Unavailable action cards say that compatible hardware and permission are required.
The TetherBox evaluates the count and duration. TetherX sends notifications and commands the selected outputs when the rule activates. A camera or detector that stops reporting does not establish that an area is empty.
Create an Automation
Go to Admin → Cameras → select the camera → Rules tab → Create automation. The five steps are Watch, Where, When, Actions and Review. Use Previous or a completed step to change an earlier choice.
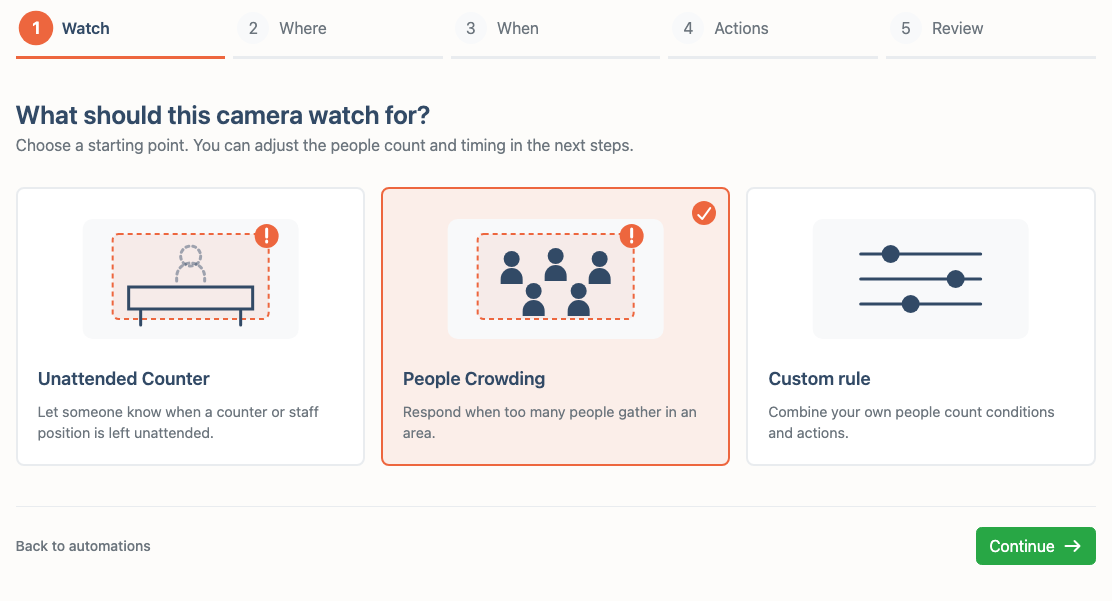
1. Choose What to Watch
- Unattended Counter starts with fewer than 1 person for 60 seconds.
- People Crowding starts with more than 5 people for 60 seconds.
- Custom rule lets you combine your own count conditions and actions.
These are starting values. Change them to suit the camera and area. The screenshots below illustrate a crowd alert in a shopping centre.
2. Draw and Name the Region
- Choose Area on the camera picture.
- Tap the corners of the area to watch, then choose Finish.
- Give the region a name, such as Front counter or Central area.
- Choose Continue. Existing named regions can also be used, and you can draw additional regions for other conditions.
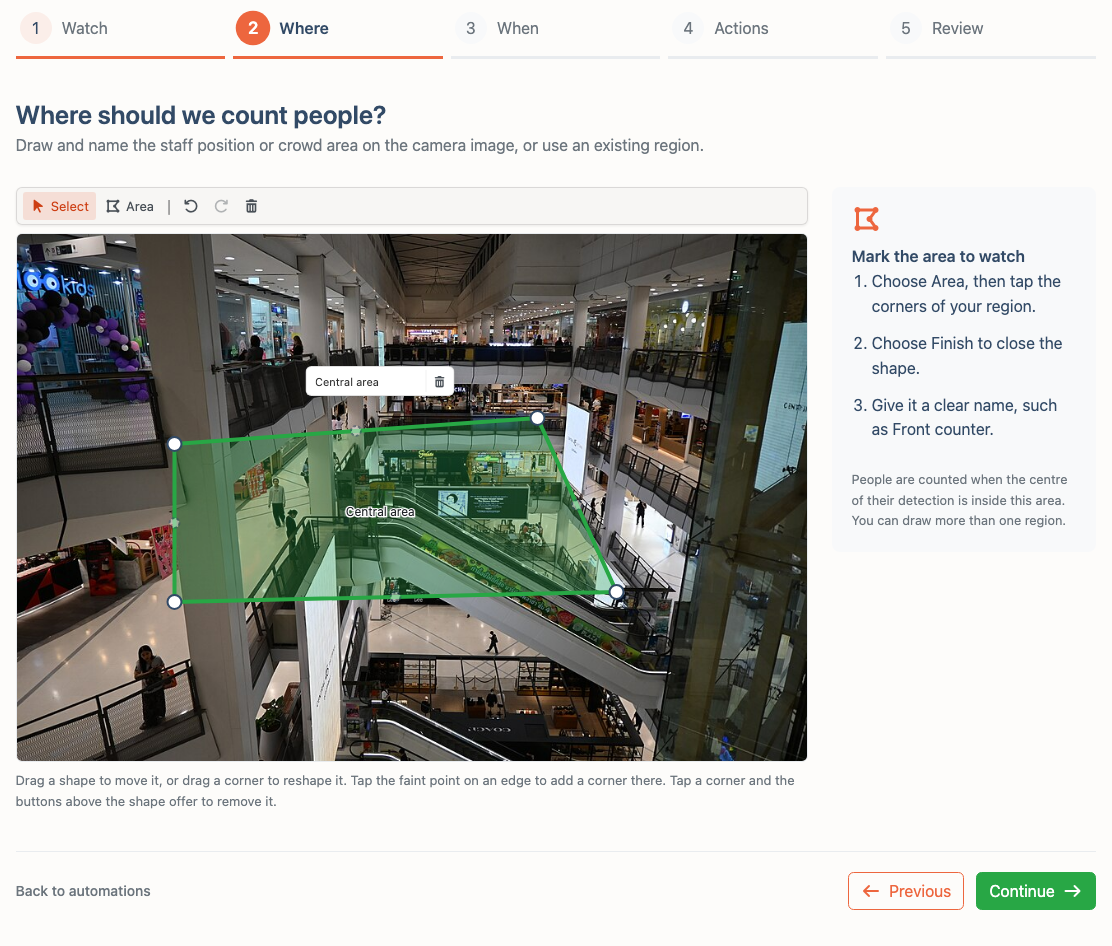
People count when the centre of their detected bounding box is inside the region. The count describes people detected in that area; it does not identify an employee or measure the number of visitors who crossed an entrance.
Tip: For an unattended counter, draw the staff position behind the counter. Including the customer queue can make waiting customers count as somebody attending the counter.
For totals of entries and exits over a day, see People Counting.
3. Set the Count and Duration
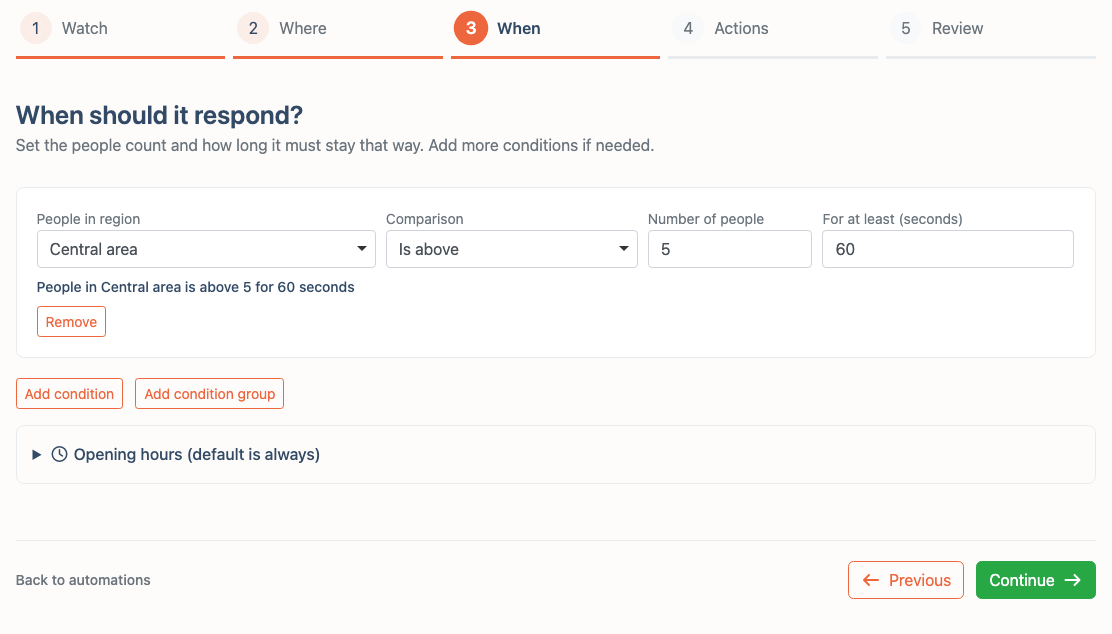
Select People in region, a Comparison, the Number of people and For at least (seconds).
| Example | Region | Comparison | People | Seconds |
|---|---|---|---|---|
| An unattended counter | Front counter | Is below | 1 | 60 |
| A crowd lasting a minute | Central area | Is above | 5 | 60 |
| A threshold that includes five people | Central area | Is at least | 5 | 60 |
Is above 5 means six or more people. Is at least 5 includes five. Is below 1 means zero people.
The count must meet the comparison continuously for the duration. If it stops meeting the comparison, that condition's timer starts again the next time it qualifies. A gap in valid observations also resets the timer.
Combine Conditions
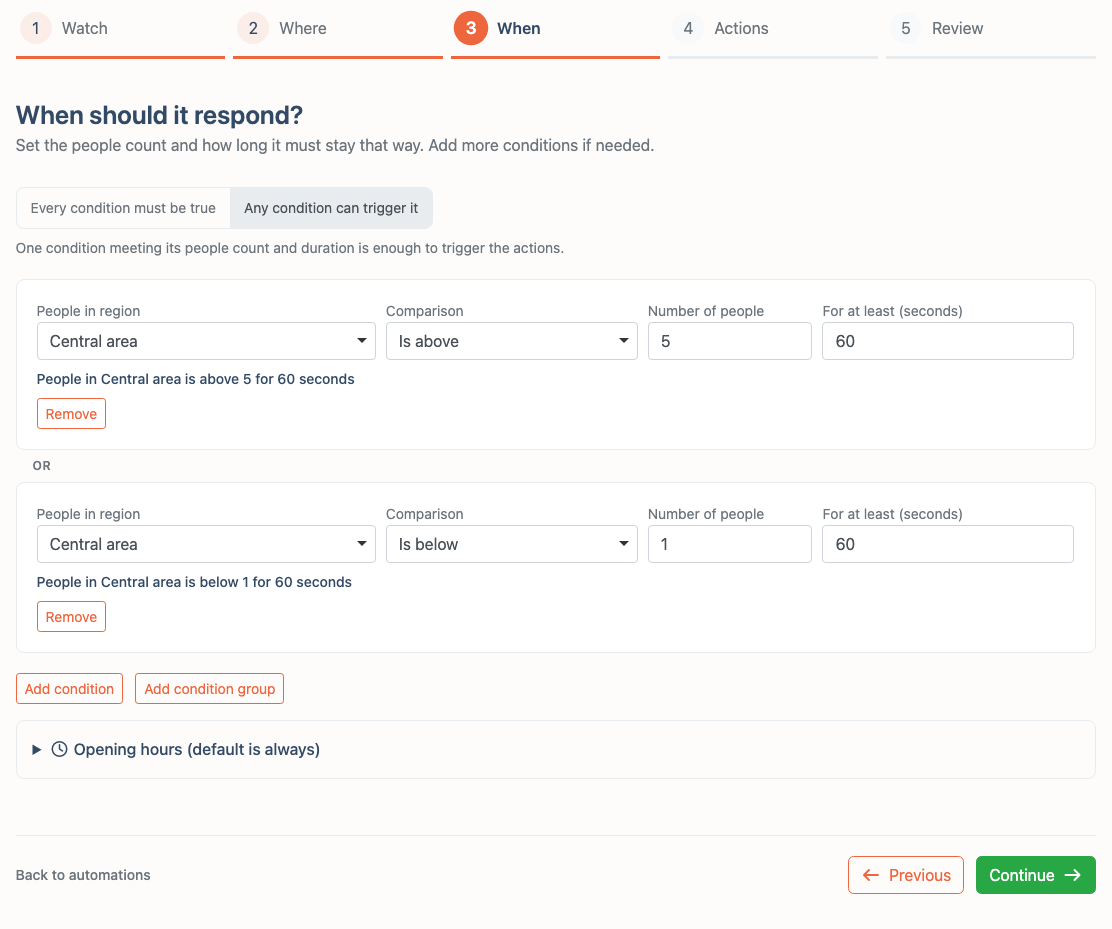
Choose Add condition when another count should be checked:
- Every condition must be true joins conditions with AND. Each must meet its own count and duration at the time the rule activates. For example, the staff region is empty for 60 seconds and the customer region has at least one person for 10 seconds.
- Any condition can trigger it joins conditions with OR. One qualifying condition is enough. For example, the same area is crowded or empty for 60 seconds.
- Add condition group puts alternatives inside a group. For example, require an unattended counter and either of two customer waiting areas to contain people. Give each region its own name so the review is easy to check.
Choose Active Hours
Expand Opening hours (default is always) to select the days and times when the rule should run. With no hours selected, the rule runs all day. Check the timezone shown in the editor; it uses the site's local clock.
These hours are independent of the camera's arming and control-room monitoring schedule. Choose explicit hours if, for example, a counter should be staffed only while the business is open. Leaving the active hours resets the condition timers.
4. Choose the Actions
Select an action card, complete its settings and add further actions if needed. Each action appears as a separate card below the choices. Use Remove to discard an action.
| Action | What to Choose |
|---|---|
| Notify TetherX user | An accessible user and Push, Email, or Push and email. |
| Send email to address | The destination email address, which does not need to belong to a TetherX user. |
| Play audio challenge | A saved Recording and play count. Record new message lets you name a message, hold to record, listen and save it. Playback uses the camera's configured speaker output. |
| Set relay output | The PicoFlex board, a reported Output number, On, Off or Pulse, and the maximum duration where applicable. |
| Activate camera deterrent | An available deterrent, its recording or output where offered, and maximum duration. The choices depend on the camera's reported capabilities. |
| Garrison mode | The participating cameras at the same site and maximum duration. The action activates supported sirens and strobes on those selected cameras. |
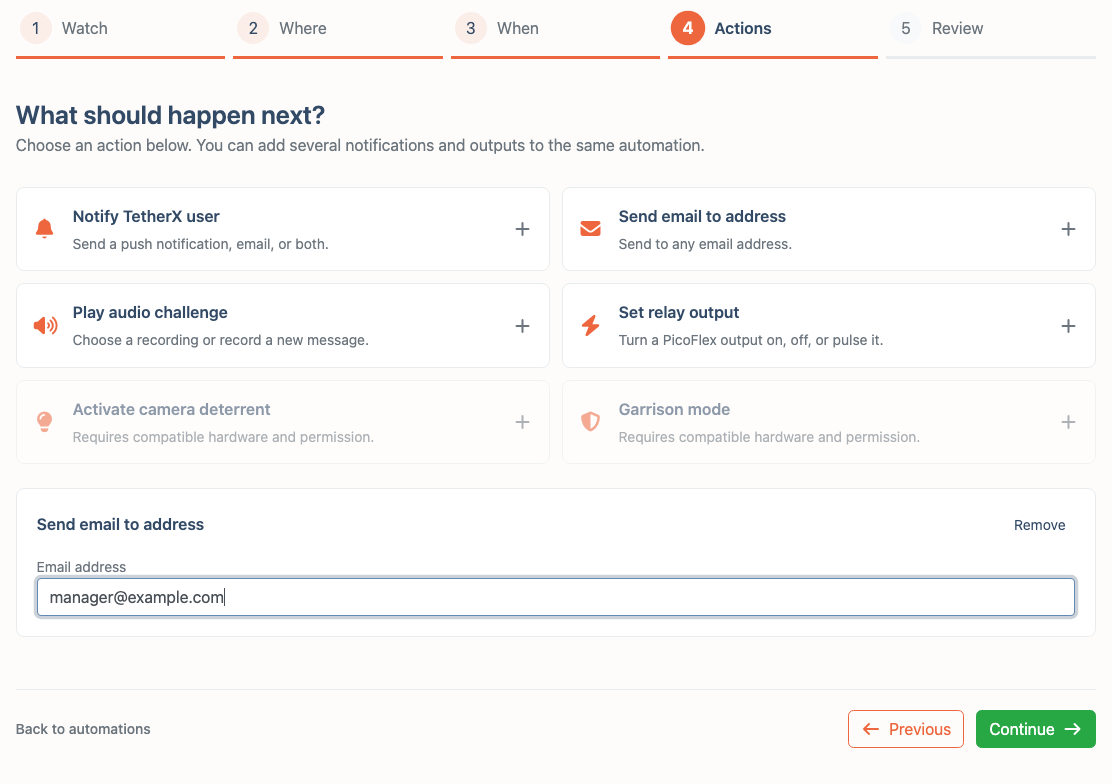
Tip: Start with a notification while checking the region and timing. Add the audio or physical output once the rule behaves as intended on that camera.
5. Review and Save
Check When, During and Then. Use Edit beside a section to change it. Enter a recognisable Name and leave Enabled checked to run the rule, or clear it to save the rule paused.
Expand Activation limits to set the minimum time between activations and maximum activations per hour. These limit new activations; they do not send another notification every minute while a condition remains true.
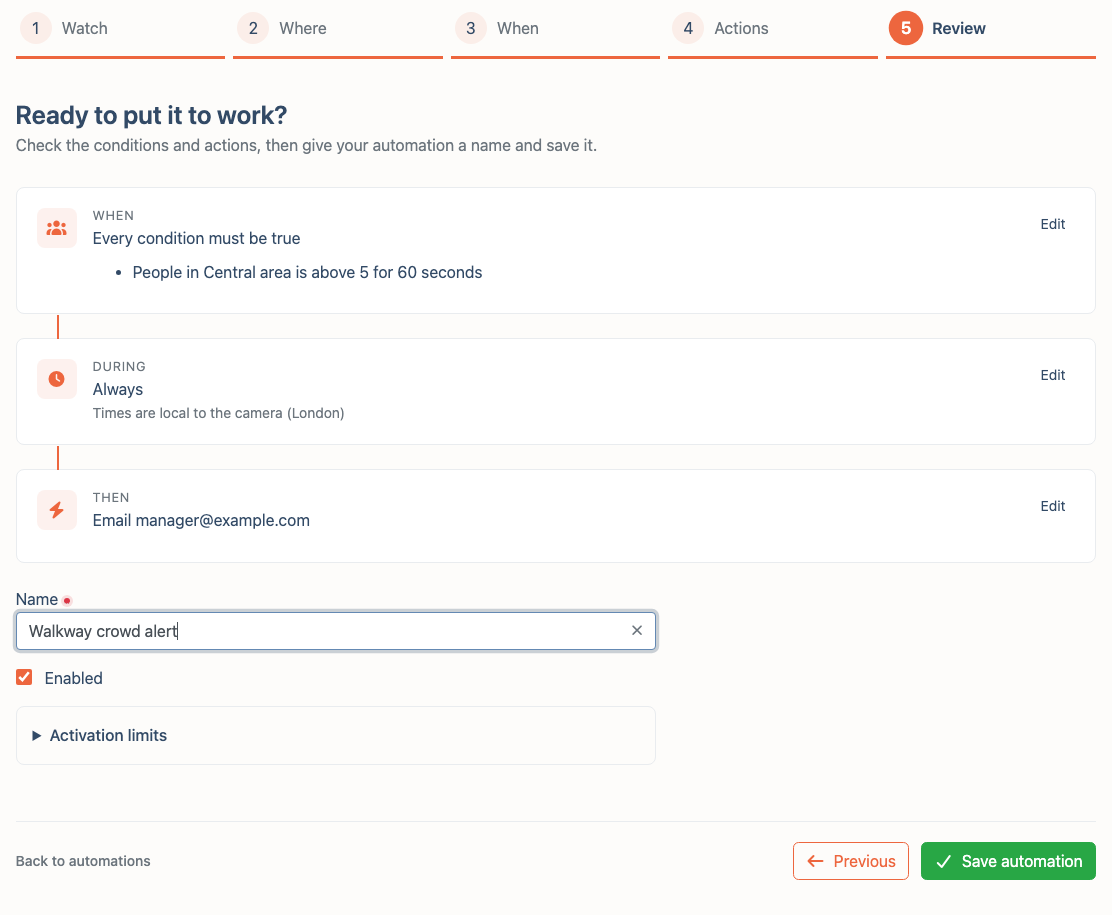
Choose Save automation. The rule initially shows Syncing with TetherBox. It shows Active on TetherBox after the matching configuration is acknowledged and current observations arrive.
Check Results and Change a Rule
Open a saved rule from Rules or its camera's Rules tab. It opens on Review, with its status and Recent activations below. Each activation links to its event and lists the region counts and action results.
An action shown as accepted or queued records delivery or command progress. It does not by itself prove that an email was read or a physical device operated successfully. Check any failed or unconfirmed result and the actual equipment when testing outputs.
The rule starts a new activation after its conditions clear and subsequently qualify again, subject to its activation limits. Pausing or changing a rule ends its current activation. Physical outputs have bounded durations, and TetherX requests a stop when their activation ends; normal email and push notifications are not withdrawn.
Troubleshooting
| What You See | What to Check |
|---|---|
| Rules is missing | The menu item and camera tab are currently Staff-only. Contact TetherX Support to configure a rule. |
| Set up this camera first | Enable TetherX AI and turn off Only Monitor before opening the builder. |
| Syncing with TetherBox persists | Check that the TetherBox is online and its cloud, box and detector software support automations. |
| Unavailable | Check the camera's active state, TetherBox connection and current AI observations. An old observation is not a current count. |
| Paused | Open the rule, check Enabled and save when it should run. |
| Activation limit reached | Review the hourly limit and the camera's recent activations. |
| A condition does not activate | Check the region, comparison, duration and active hours. A person outside the polygon does not count, and an interrupted condition restarts its timer. |
| An output action is unavailable | Check the configured speaker, reported relay outputs or advertised deterrents, and the account's permissions. |
| The first alert arrived but no more followed | The same ongoing activation does not create repeated notifications. Check whether the condition cleared and qualified again. |
Related Articles
- People Counting - Read entries and exits across a counting line.
- TetherX AI - The detections used by camera rules.
- Camera Masking - The shared drawing controls for camera areas.
- Talkdown - Configure a speaker and audio playback.
- MicroChip - PicoFlex inputs and outputs.
The camera picture is a shopping centre interior by PattayaPatrol (opens in a new tab), licensed under CC BY-SA 4.0 (opens in a new tab), resized and shown with the region editor drawn over it.
Referenced in: